
[os] install from scratch1
system preference
제일 먼저할 것은 우선 system preference에서 설정한다.
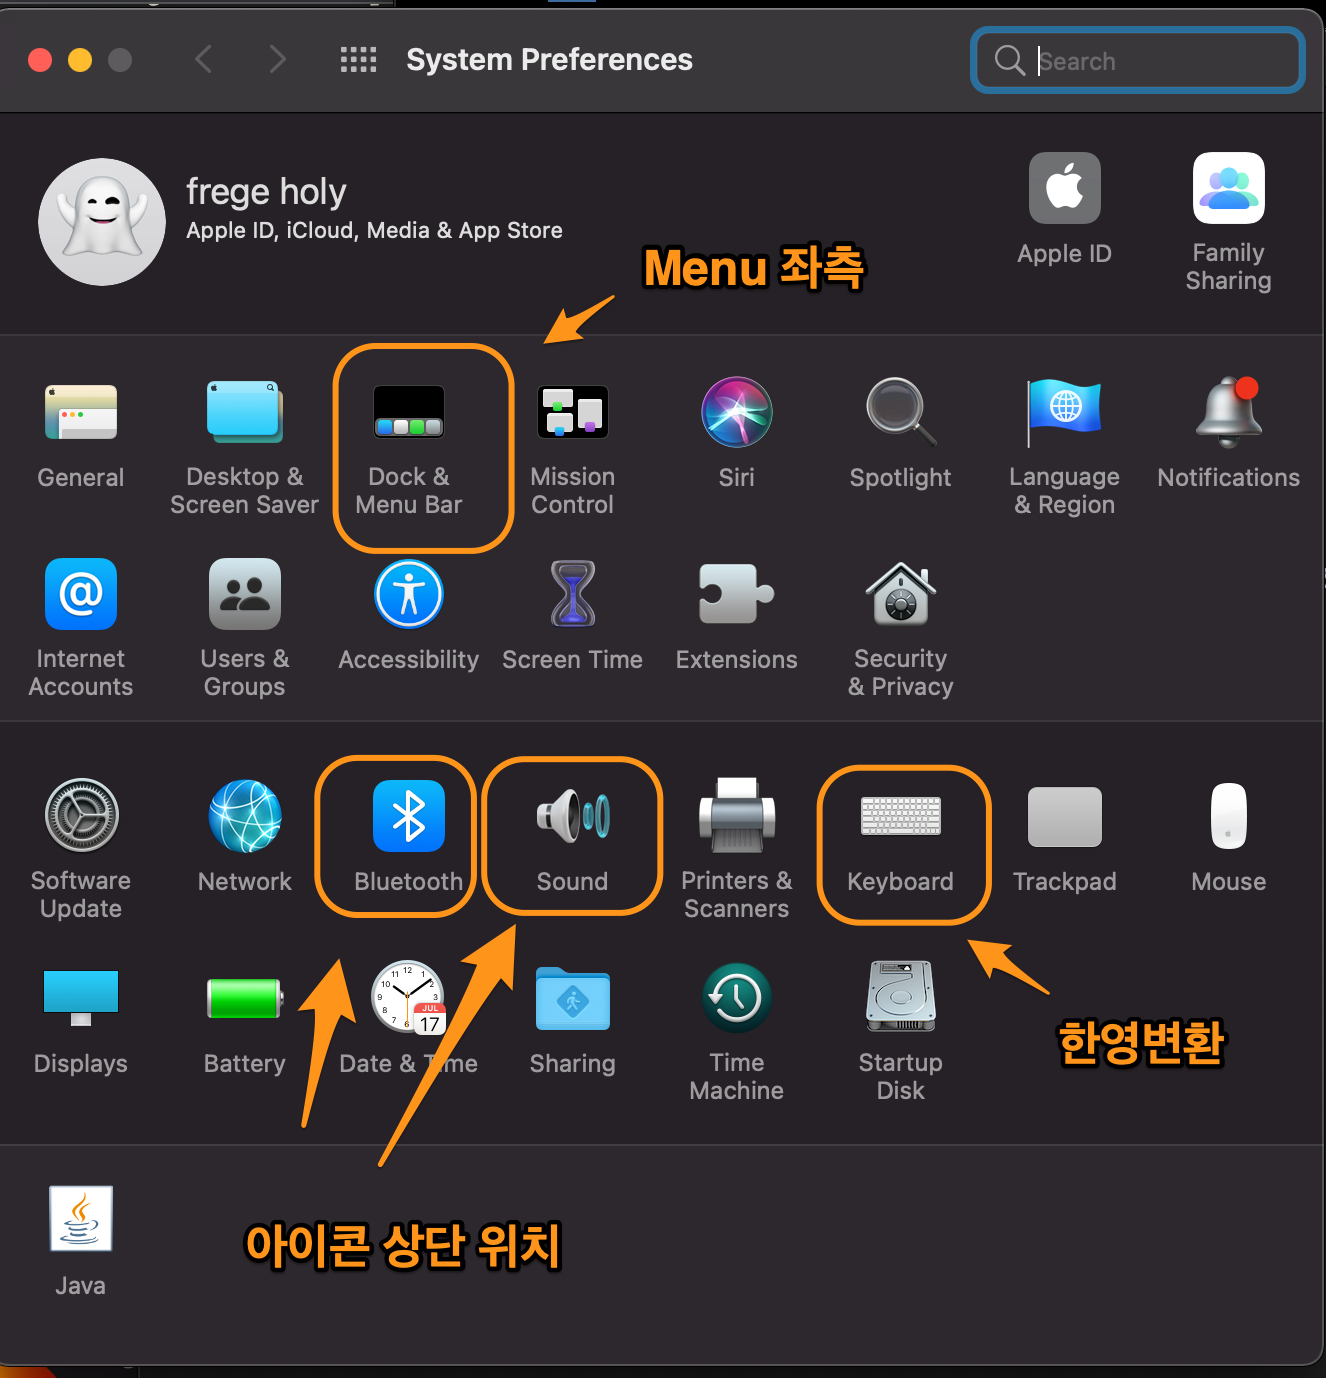
Figure 1: system
App Store
App store login 에서 필요한것들 다 다운 받는다. 그 중 res를 다운받는다. 왜냐하면 모니터 세팅부터 해야 하기 때문이다.
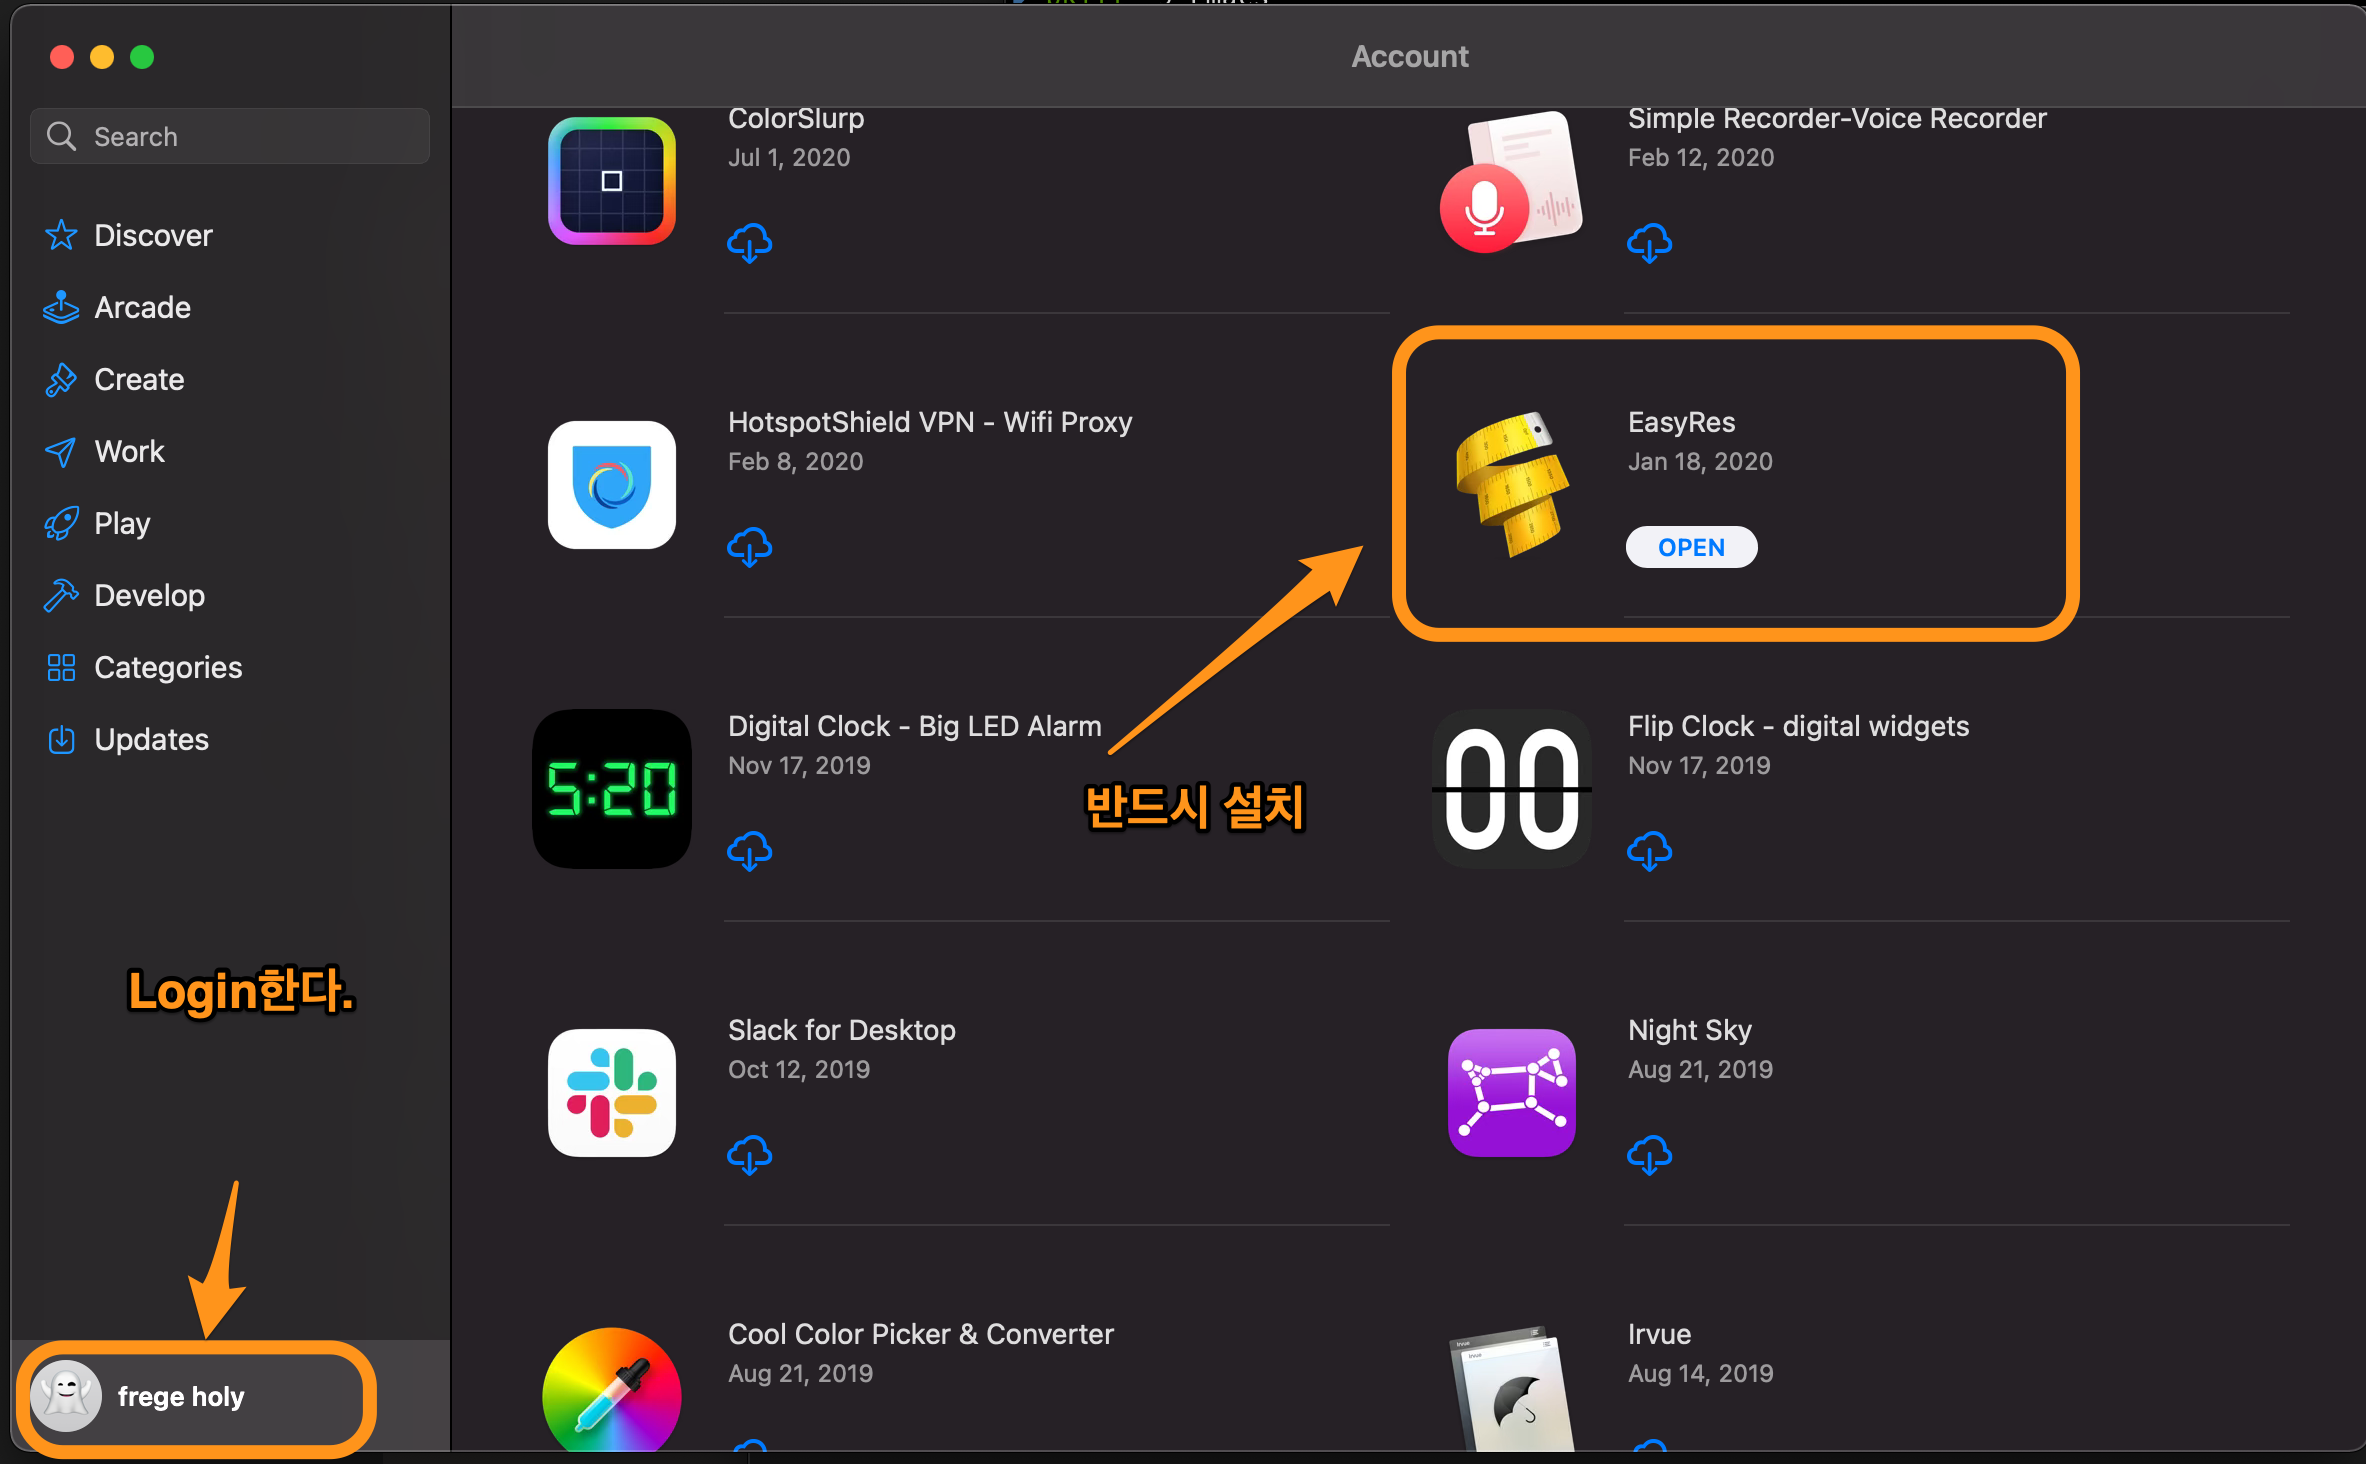
Figure 2: res
karabiner
karabiner를 다운받고 caps-lock을 설정한다.
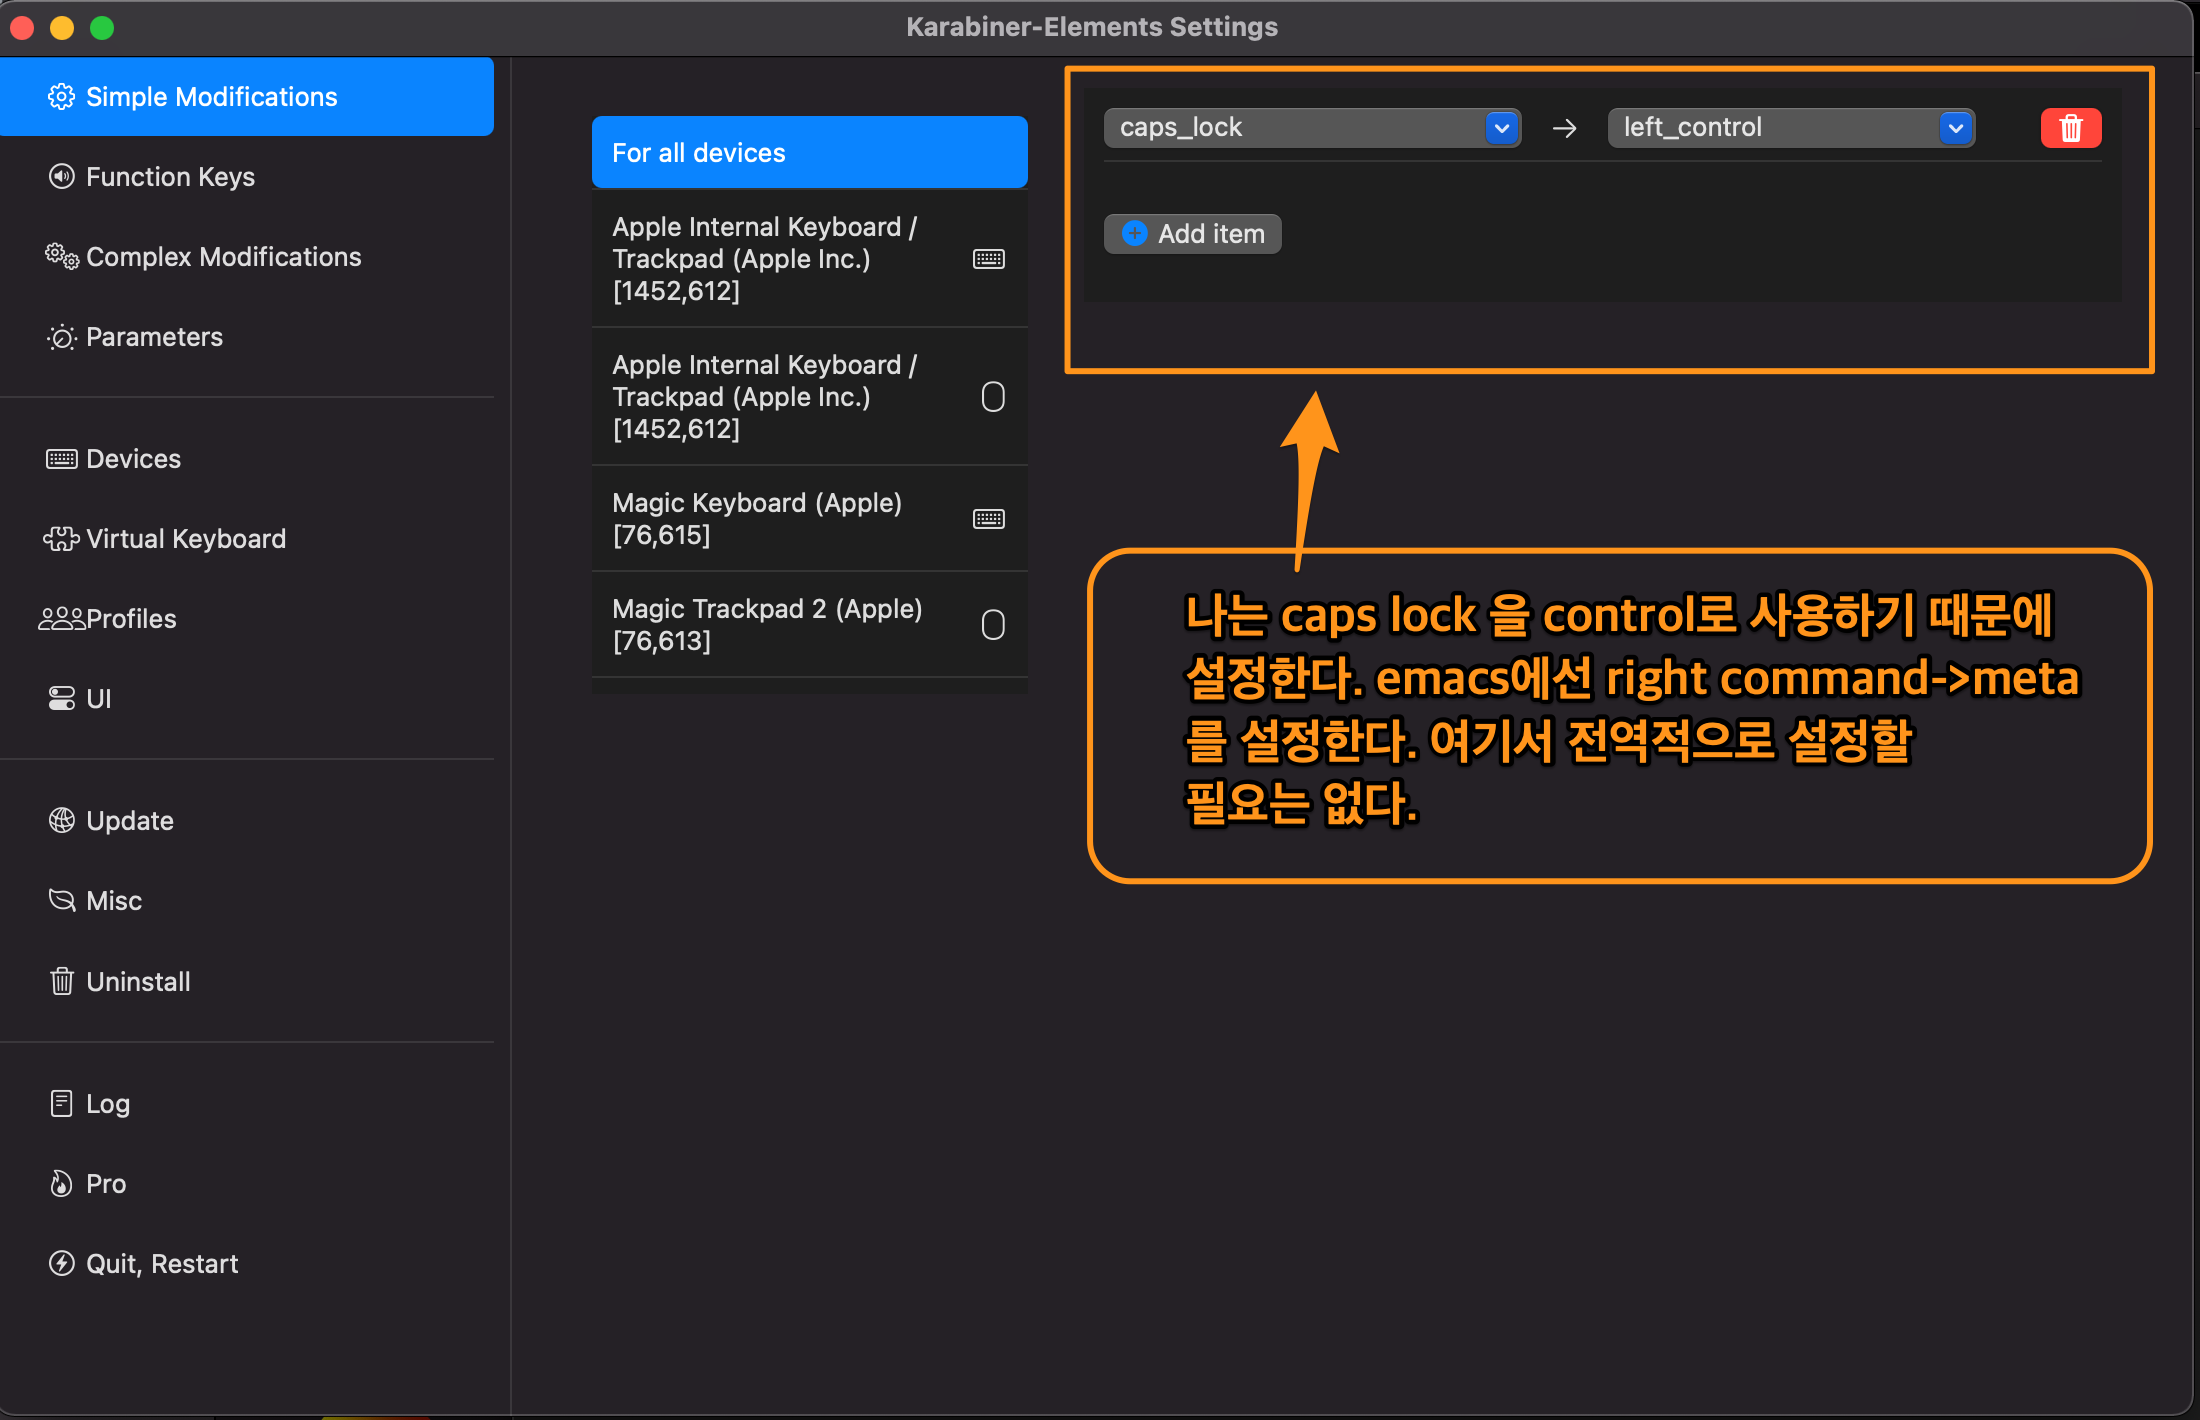
Figure 3: caps lock
brew 설치
여기 로 이동해서 다음을 terminal에서 실행한다.
/bin/bash -c "$(curl -fsSL https://raw.githubusercontent.com/Homebrew/install/HEAD/install.sh)"
iterm2 설치
brew install --cask iterm2
zsh 설치
iterm2를 실행한 후
brew install zsh
zsh를 실행한다.
oh-my-zsh 설치
sh -c "$(curl -fsSL https://raw.githubusercontent.com/ohmyzsh/ohmyzsh/master/tools/install.sh)"
zsh theme 설정
.zshrc를 열고 theme를 바꾼다.
Agnoster
iterm2를 재시작 한다. 그러면, font가 깨져 있을 것이다.
font 설치
emacs를 설치할때, font까지 설치하는 script를 만들었지만, 그냥 여기서 설치하기로 한다. brew로 설치하기로 한다.
fira-code font
- brew tap homebrew/cask-fonts
- brew install –cask font-fira-code
d2-coding
- brew tap homebrew/cask-fonts
- brew install font-d2coding
hack-nerd font
- brew install –cask font-hack-nerd-font
font 설정 on iterm2
Profiles -> Text -> Hack Nerd Font Mono 설정
prompt 설정- 컴퓨터 이름 제거
여기 를 참조한다. .zshrc에 마지막 줄에 다음을 추가한다.
# user@hostname에서 user만 보이기
prompt_context() {
   if [[ "$USER" != "$DEFAULT_USER" || -n "$SSH_CLIENT" ]]; then
     prompt_segment black default "%(!.%{%F{yellow}%}.)$USER"
   fi
}
prompt 설정- current directory 설정
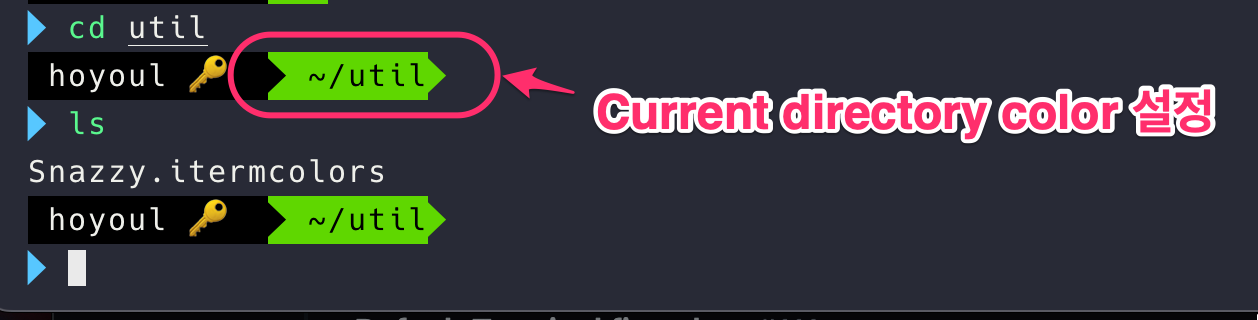 위 color를 변경하는 것은 theme에서 설정한다.
cd ~/.oh-my-zsh/themes/
vi agnoster.zsh-theme
아래를 고친다. 076으로 고쳤다.
# Dir: current working directory
prompt_dir() {
  prompt_segment 076 $CURRENT_FG '%~'
}
prompt 설정 - newline 추가
한줄에 명령어를 나열하기엔 공간이 모자란다. 다음과 같이 theme 파일을 연다.
vi ~/.oh-my-zsh/themes/agnoster.zsh-theme
build_prompt() {
  RETVAL=$?
  prompt_status
  prompt_virtualenv
  prompt_aws
  prompt_context
  prompt_dir
  prompt_git
  prompt_bzr
  prompt_hg
  prompt_newline # 해당 위치에 꼭 입력해주어야 합니다.
  prompt_end
}

# 해당 내용을 추가합니다.
prompt_newline() {
  if [[ -n $CURRENT_BG ]]; then
    echo -n "%{%k%F{$CURRENT_BG}%}$SEGMENT_SEPARATOR
%{%k%F{blue}%}$SEGMENT_SEPARATOR"
  else
    echo -n "%{%k%}"
  fi

  echo -n "%{%f%}"
  CURRENT_BG=''
}
prompt 설정 - emoji 추가하기
.zshrc에서 추가한다. 해당 파일을 연다.
prompt_context() {
  # Custom (Random emoji)
  emojis=("⚡️" "🔥" "🇰 " "👑" "😎" "🐸" "🐵" "🦄" "🌈" "🍻" "🚀" "💡" "🎉" "🔑" "🚦" "🌙")
  RAND_EMOJI_N=$(( $RANDOM % ${#emojis[@]} + 1))
  prompt_segment black default "holy ${emojis[$RAND_EMOJI_N]} "
}
zsh-autosuggestions 설정
이 기능은 미리 예측되는 명령어를 흑백톤으로 보여준다.
- brew install zsh-autosuggestions
- verbose에서 나온 코드를 추가한다.
source /opt/homebrew/share/zsh-autosuggestions/zsh-autosuggestions.zsh
zsh-highlighting
prompt다음에 사용자가 명령어를 쓰면 color로 highlighting된다.
- brew install zsh-syntax-highlighting
- verbose에서 나온 코드를 추가한다.
source /opt/homebrew/share/zsh-syntax-highlighting/zsh-syntax-highlighting.zsh
ls color설정
ls를 했을때 folder와 file을 color로 구분하기 위해서 다음과 같이 세팅한다. .zshrc파일을 연다.
if [[ -x "$(command -v gls)" ]]; then
  alias ls='gls --color=auto'
  if [[ -x "$(command -v gdircolors)" ]]; then
    eval "$(gdircolors -b)"
  fi
fi
export LSCOLORS="ExGxFxdxCxdadahbadacec"
iterm2 color theme 설정
snazzy theme를 적용하자.
- mkdir util && cd util
- curl -LO https://raw.githubusercontent.com/mbadolato/iTerm2-Color-Schemes/master/schemes/Snazzy.itermcolors
- iterm2 settings-> color theme -> import snazzy해서 사용한다.
iterm2 나머지 설정
- Title bar style Appearance > General> Theme: Minial
- Title bar 밑에 1px 라인제거 Appearance > Windows > Show line under title bar when the tab bar is not visible: 체크 안함
- 폰트 크기 및 줄간격 변경 Profiles > Text: 폰트사이즈 15로 변경 Profiles > Text: n/n 줄간격 130으로 변경
- margin 수정 Appearance > Panes > Side margins: 20 Appearance > Panes > Top & bottom margins: 10
- 탭 선 제거 Advanced ->In minimal theme, how prominent should the tab outline be?: 0
- Unicode 설정 Profiles->Text->Unicode normalization form:NFC
neofetch 설정
여기 를 참조하자.
- brew install neofetch
- brew install imagemagick
- mkdir -p ~/.config/neofetch/images
- 사진을 해당 폴더에 옮긴다.
- vi ~/.config/neofetch/config.conf 여기에 써야하는건 검색요.
- .zshrc에 neofetch추가
- iterm2에서 advanced 설정: Disable potentially insecure escape sequences → No로 설정, Show inline images at retina resolution → No로 설정
Icloud 처리
나는 icloud의 document와 desktop을 동기화해서 사용한다. 다음과 같이 설정하자.
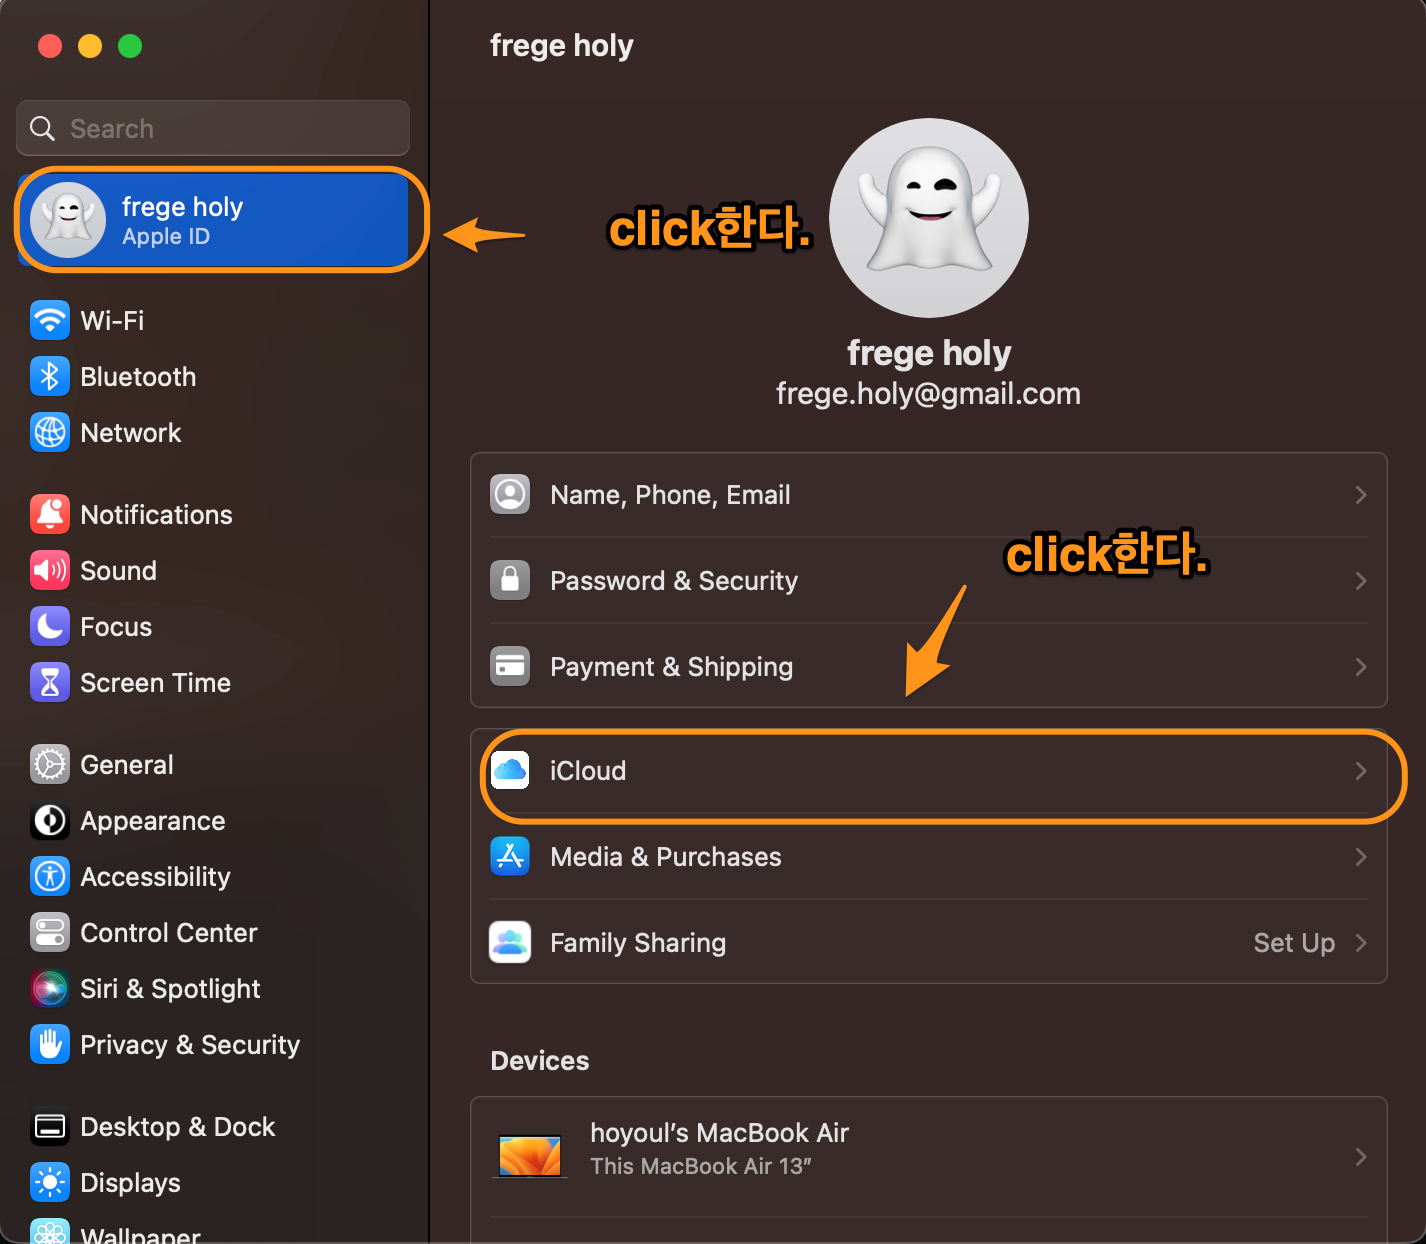
Figure 5: icloud1
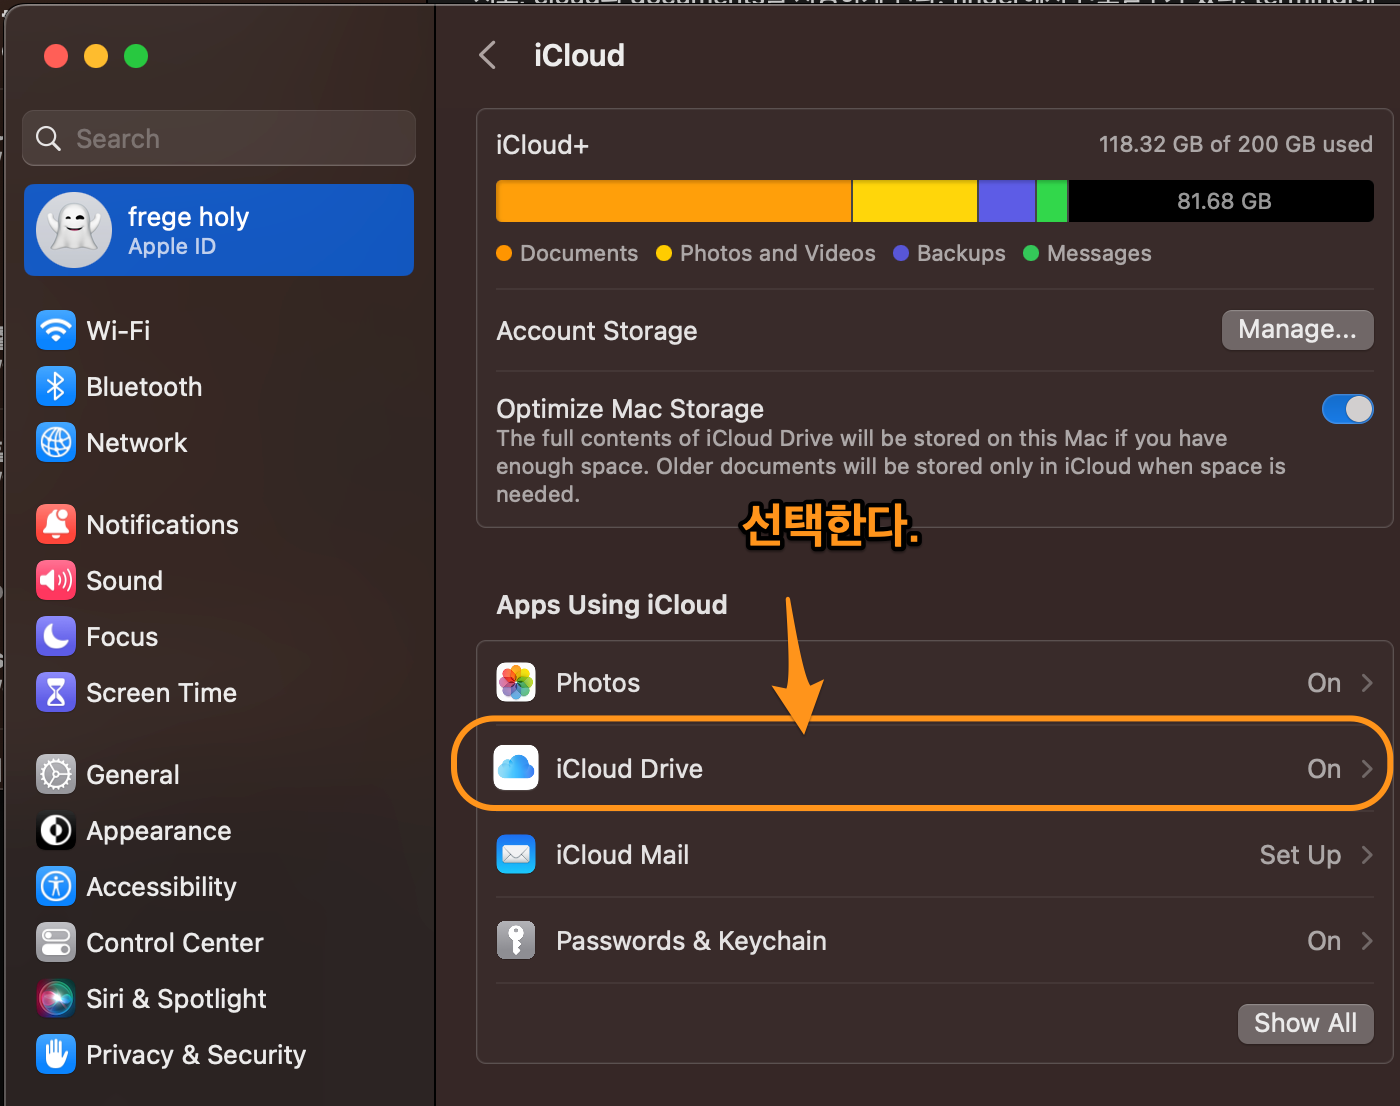
Figure 6: icloud2
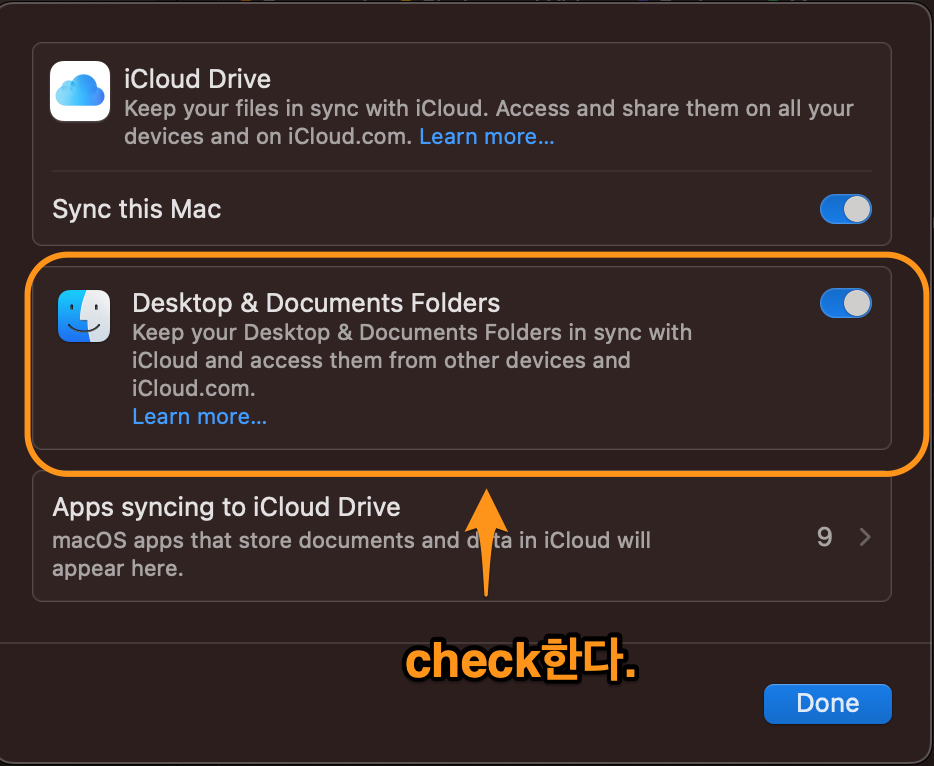
Figure 7: icloud3
discord 설치와 switching account
brew install --cask discord
나는 회사 email 계정이 이미 있는 상태에서, email 부계정(hoyoul+a10@whitebrew.com )으로 가입했기 때문에 정상적인 login을 하면 회사의 server가 보이지 않는다. 그래서 위의 부계정으로 login해도 되지만, 정 계정으로 login하고 switch accounts로 계정변경해서 사용할 수 있다.
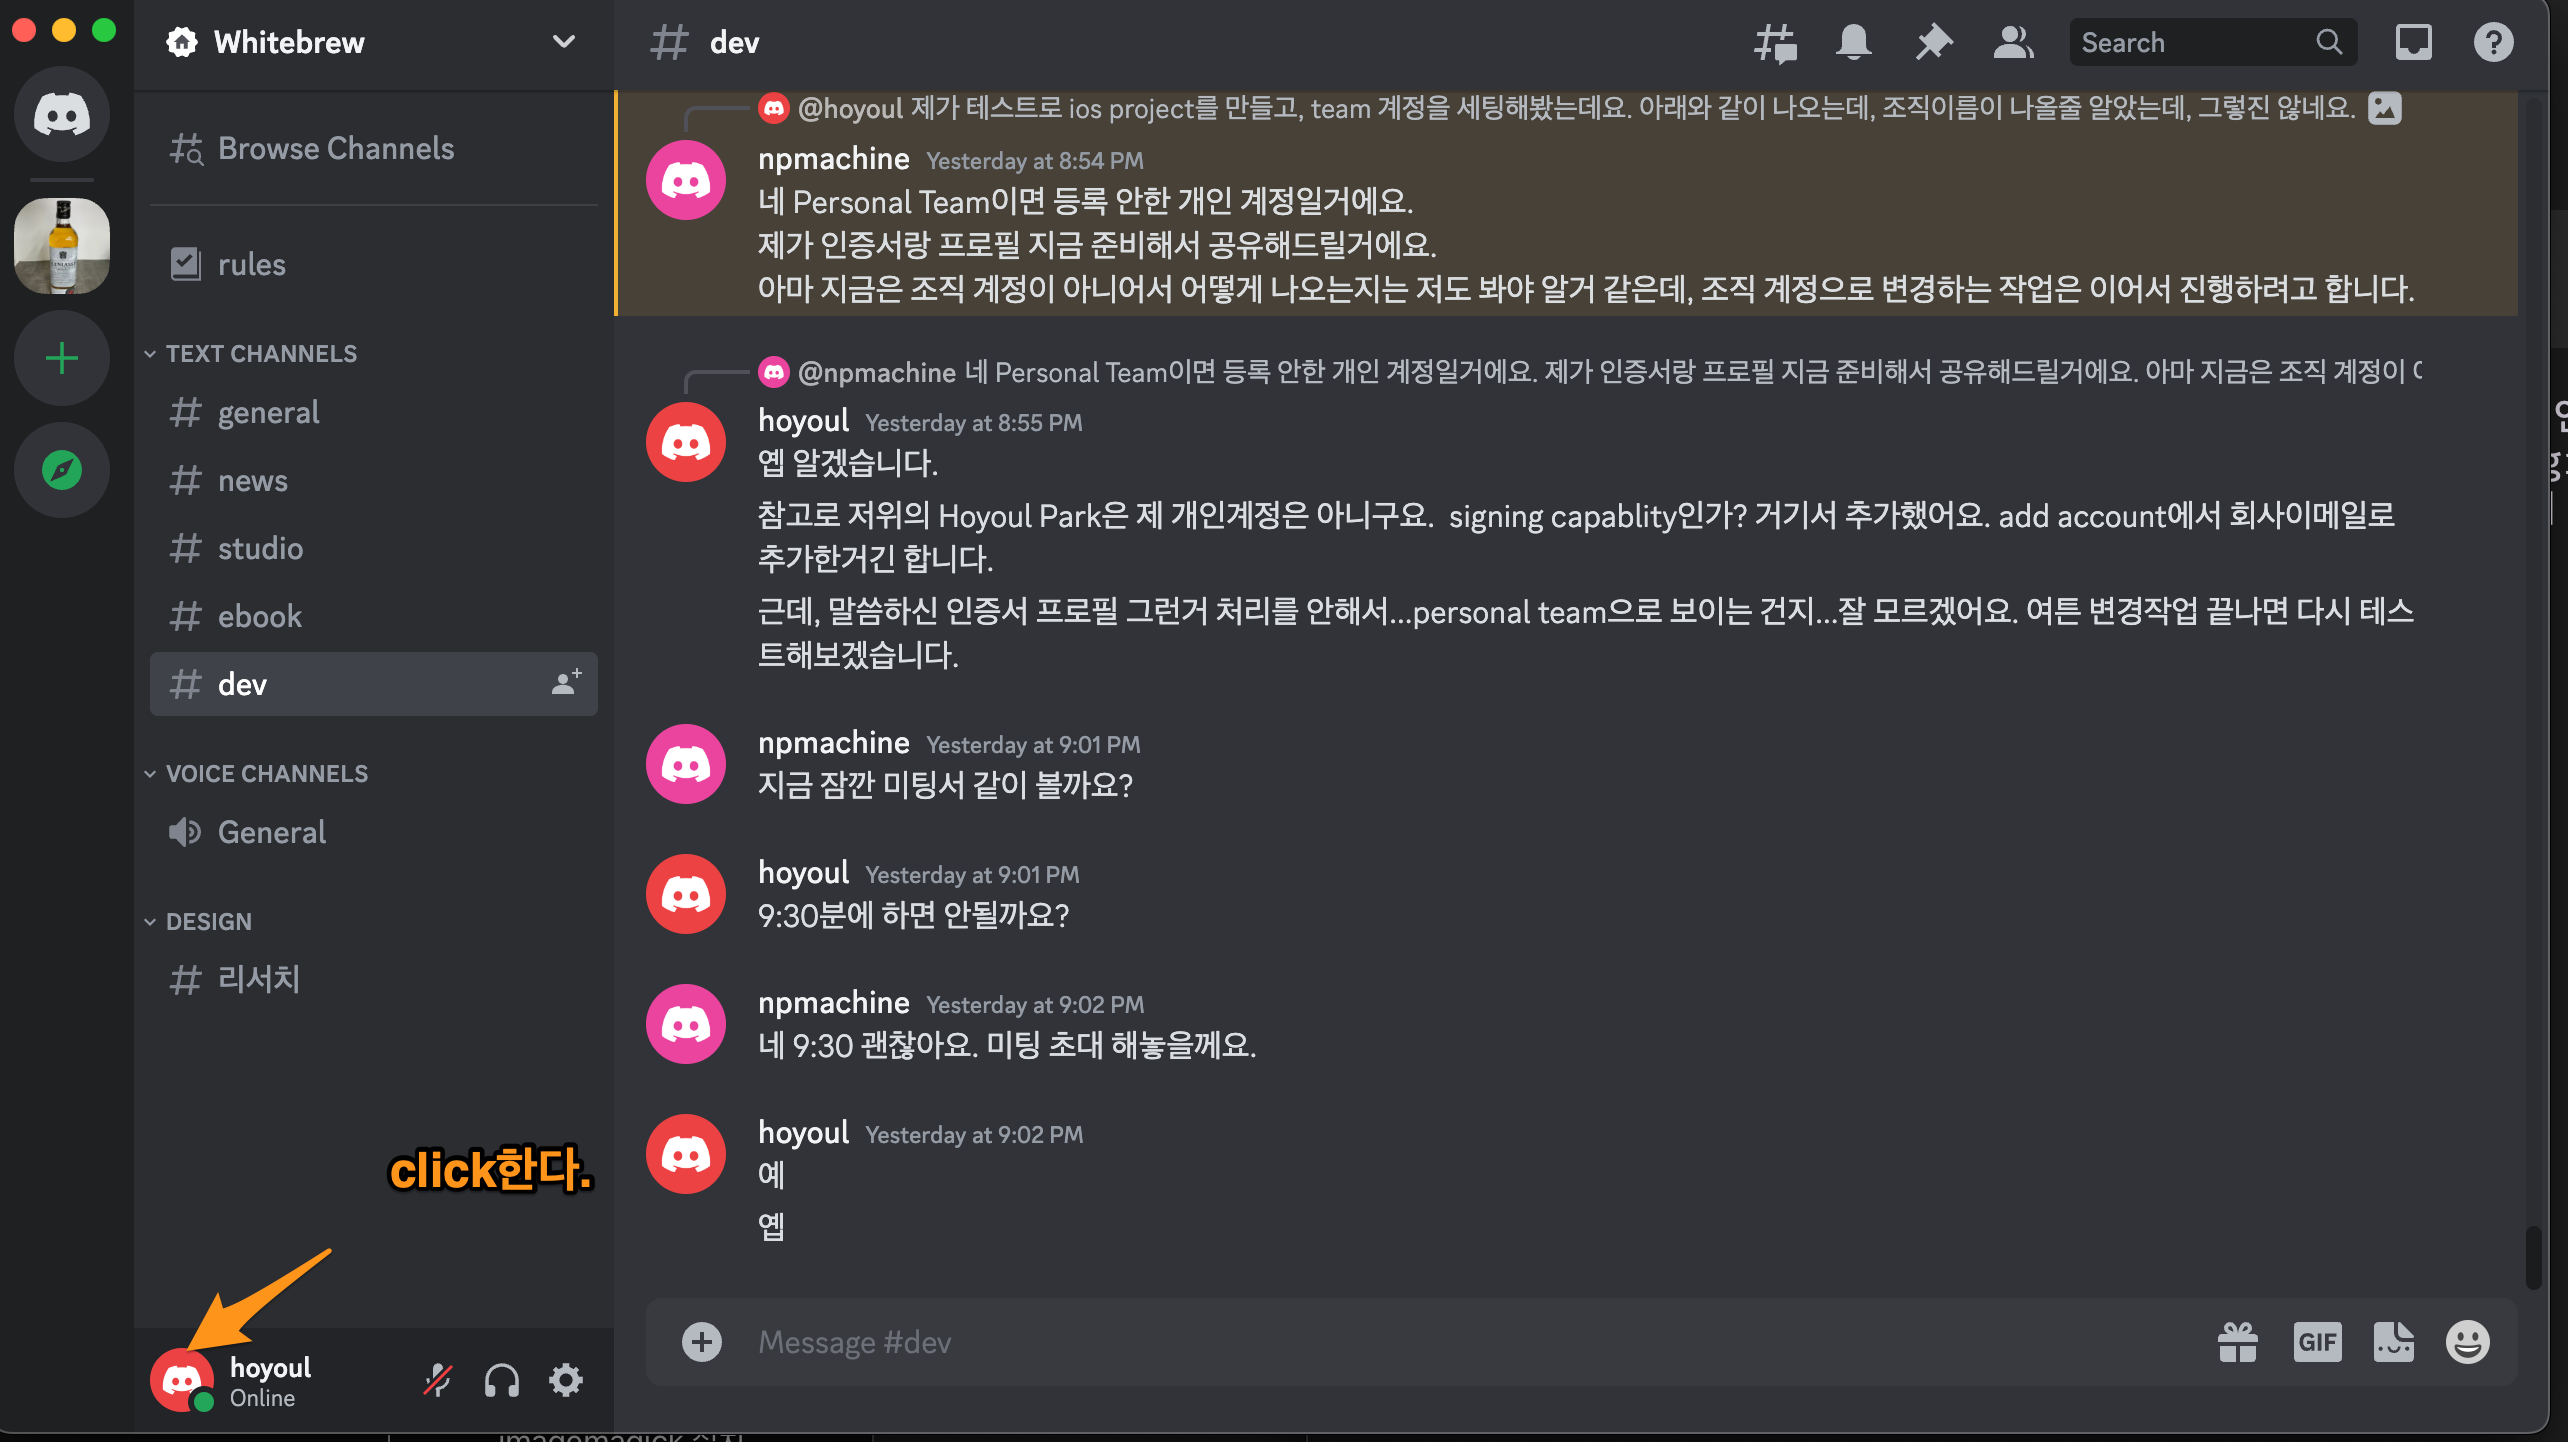
Figure 8: discord1
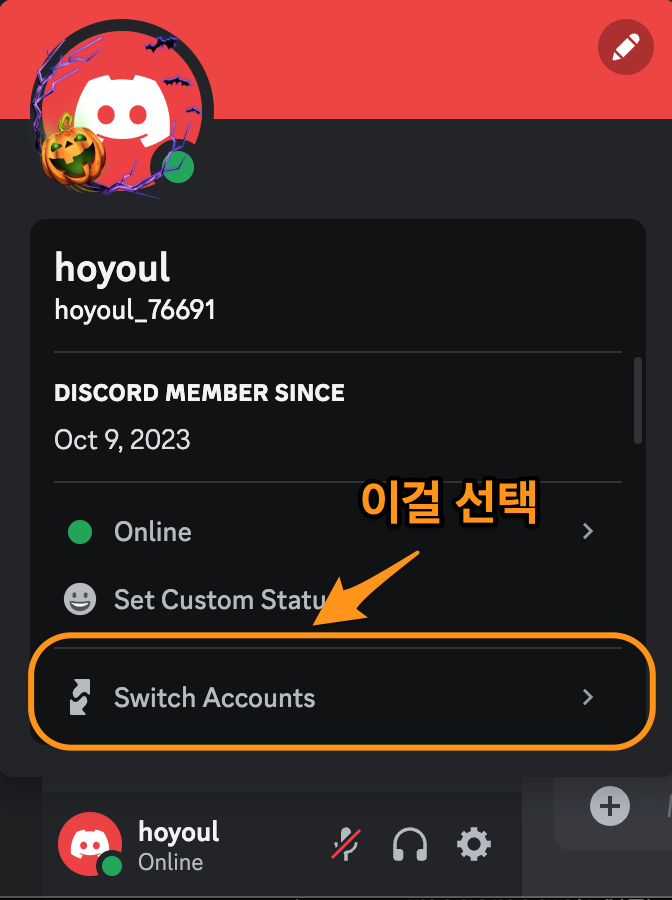
Figure 9: discord2
ripgrep 설치
emacs에서 사용하는 grep인데 먼저 설치하자.
brew install rg
hugo 설치
blog를 사용할때 사용하는 hugo다.
brew install hugo
multiple github account 설정
여기 를 참조한다.
emacs 설치
여기 를 참조한다.
Tex 설치
여기 를 참조한다.
mu4e 설치
여기 를 참조한다.
anaconda설치
python 개발시 anaconda를 사용한다.
brew install --cask anaconda
.zshrc에 추가한다.
export PATH="/opt/homebrew/anaconda3/bin:$PATH"
ruby & rails 설치
다음 을 참조한다.
flutter 설치
여기 를 참조한다.